


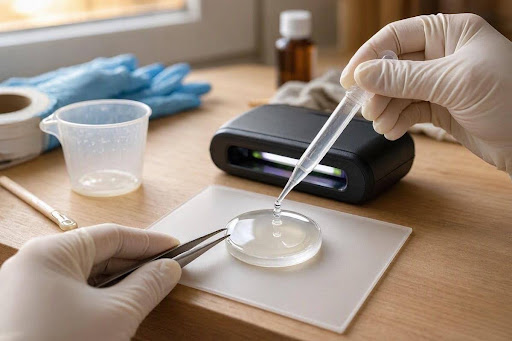
UV epoxy is a great choice for crafts, jewelry, and small DIY projects. It creates a clear, shiny finish that makes items look neat and beautiful. It also dries fast under a UV lamp. This makes it a good choice for people who want quick results without a long wait.
However, getting a smooth finish takes care and patience. Dust, air bubbles, and uneven layers can spoil the final look. Poor curing can also leave the resin soft or sticky. The good news is that you can avoid most of these problems by following a few simple steps. This guide explains how to apply UV Epoxy for a clean, smooth, and glossy finish.
Pro Tips for Application
1. Prepare the Surface
Start with a clean surface. Dust, oil, and fingerprints can stop the resin from sticking well. They can also leave marks under the clear coat. Clean the item with a suitable cleaner and let it dry fully. If the surface needs sanding, follow the product instructions before you begin.
Next, place the item on a flat table. Cover the table to protect it from spills. Make sure the area is clean and free from dust. A level surface helps the resin spread evenly. It also stops the liquid from gathering on one side. Keep your tools close so you can work without stopping.
2. Gather the Right Tools
The right tools can make your work much easier. You do not need many items for a small project. However, each tool should suit the type of resin you use. A good UV lamp is very important because the resin needs the right light to harden fully.
Prepare these items before you start:
- UV epoxy: Choose a product that suits your project.
- UV lamp: Check that it works with your resin.
- Small spreader: Use it to spread the resin evenly.
- Lint-free cloth: Use it to remove dust and dirt.
- Protective gloves: Wear gloves that suit the resin.
- Eye protection: Protect your eyes from resin and UV light.
Having everything ready helps you work faster. It also lowers the risk of mistakes during the process.
3. Apply a Thin Layer
Start by placing a small amount of UV Epoxy on the surface. Use a small spreader to move the resin across the area. Try to cover the whole surface with a thin, even layer. Do not add too much resin at once. A thick layer may not harden well under the UV lamp.
Move the spreader slowly and gently. Avoid pressing too hard, as this can leave marks in the resin. Pay close attention to the edges and corners. Resin can build up in these spots and create an uneven finish. If you need more coverage, add another thin layer when the product allows it.
4. Remove Air Bubbles
Air bubbles can make a smooth surface look rough. They often form when you spread the resin too fast. They can also appear when you mix or handle it too much. To reduce bubbles, apply the resin slowly and avoid fast movements. Check the surface under good light before curing.
If you see small bubbles, use a fine tool to guide them toward the edge. You can also let the resin settle for a short time if the product instructions allow it. Never use an open flame to remove bubbles. Too much heat can damage the resin and cause a fire risk. Taking a moment to check the surface can save time later.
5. Cure the Resin Properly
Curing is the process that turns liquid UV Epoxy into a hard coating. Place the item under a UV lamp that suits your resin. Follow the product guide for the correct light type, distance, and curing time. Different resins need different amounts of light, so always check the label.
Make sure the light reaches the full surface. You may need to move the item to cure areas that do not get enough light. Thick layers and dark colors can block UV light. This can leave the resin soft under the surface. Thin layers are often easier to cure well. Wear eye protection and keep your skin away from direct UV light.
6. Build a Glossy Finish
A glossy finish depends on even coverage and proper curing. After the first layer has cured, examine the surface for thin spots, rough edges, or small imperfections. If the coating looks uneven, another thin layer may improve the appearance. However, check the manufacturer’s instructions first, as some products require cleaning or light sanding before applying a new coat.
Apply the next layer carefully and spread it evenly. Keep the object level so the resin does not collect in one area. Avoid adding too much material at once, as thick coatings can cure unevenly. If you want a deeper, glass-like appearance, building the finish through several suitable layers is often a better approach than applying a large amount of resin in one go. Allow the final layer to cure fully before handling the item extensively.
7. Fix Common Problems
Small problems can happen even when you follow each step. Sticky spots may mean the resin did not get enough UV light. They can also appear when the layer is too thick or the lamp is not suitable. Bubbles may come from fast application, while a rough finish may mean the resin was spread unevenly.
Use these simple tips to avoid common mistakes:
- Sticky resin: Check the lamp and curing guide.
- Uneven surface: Apply less resin and keep the item level.
- Air bubbles: Spread the resin slowly.
- Dust marks: Clean the area before you start.
- Poor bonding: Check that the surface suits UV epoxy.
Do not add a fresh layer over resin that is still soft or sticky. First, find out why the problem happened. Follow the product guide to fix it safely. This will help prevent the same issue from appearing again.
8. Follow Safety Precautions
UV Epoxy needs careful handling. Liquid resin can harm your skin and eyes. Wear suitable gloves and eye protection while you work. Keep the room well aired and follow the safety guide for your product. Avoid touching uncured resin with bare hands.
When buying resin and related products, a trusted Adhesive Supplier Malaysia may help you find suitable materials for your project. Check the product details before buying and make sure the resin works with your UV lamp. UV lamps also need care. Never look straight at the light or expose your skin to it for long periods. Keep the lamp away from children and pets during use, and store the resin as directed on the label.
Why Customers Prefer PAS?
Pacific Adhesive Systems (M) Sdn Bhd understands the importance of choosing the right adhesive products for different needs. Customers look for products that offer reliable performance, easy use, and consistent results. By focusing on product quality and customer needs, it aims to help businesses find suitable adhesive solutions for their work.
Choosing the right product can make a big difference in any project. Whether you need adhesives for crafts, repairs, or other applications, it is important to consider the material, intended use, and product instructions. PAS can be a useful point of contact for customers seeking adhesive solutions that match their requirements.
Conclusion
Applying UV Epoxy for a smooth finish is simple when you follow the right steps. Start with a clean surface and prepare your tools. Apply a thin layer, remove air bubbles, and cure the resin with a suitable UV lamp. Add more layers when needed, but always follow the product guide.
Take your time and check your work before each layer cures. Small steps, such as keeping the surface level and working in a clean space, can make a big difference. With practice, you can create a clear, shiny finish for jewelry, crafts, and many other DIY projects. Careful work will help you get better results every time.