


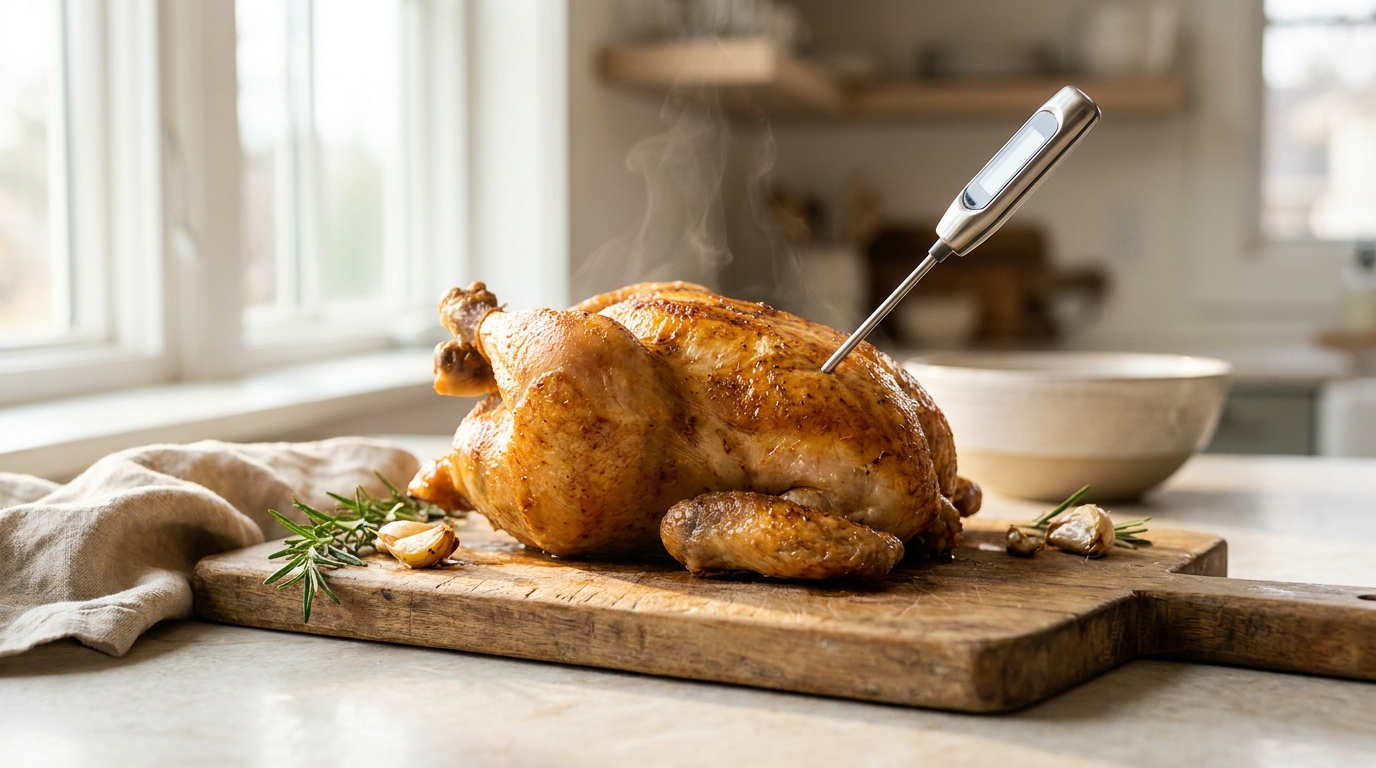
Knowing how to use a meat thermometer is the simplest way to stop guessing whether dinner is ready. Color, cooking time, and the feel of the meat can all mislead you, while a correctly placed probe gives you a real number that you can compare with food safety guidelines. This guide explains the main types of thermometers, where to insert them, how to read them, how to check their accuracy, and which mistakes cause wrong readings, using public guidance from the U.S. Department of Agriculture (USDA) and several university food safety programs.
Quick Reference: Safe Minimum Internal Temperatures
The figures below come from the USDA’s safe minimum internal temperature chart, which the agency most recently updated in 2025. They are minimums for food safety, and the USDA notes that people may cook food to higher temperatures if they prefer it that way.
| Food | Minimum internal temperature | Extra note from the USDA |
|---|---|---|
| Beef, pork, veal, and lamb (steaks, chops, roasts) | 145°F (63°C) | Rest for at least 3 minutes |
| Ground beef, pork, veal, and lamb | 160°F (71°C) | Applies to burgers and meatloaf |
| All poultry, including ground poultry and stuffing | 165°F (74°C) | Applies to every part of the bird |
| Fish and shellfish | 145°F (63°C) | Measured in the thickest part |
| Eggs and egg dishes | 160°F (71°C) | Applies to cooked egg dishes |
| Leftovers and casseroles | 165°F (74°C) | Reheat until the center reaches this number |
| Fully cooked ham (reheating) | 140°F (60°C) or 165°F (74°C) | 140°F only for ham packaged in USDA-inspected plants |
Why Color, Juices, and Timers Are Not Reliable
Many home cooks still judge doneness by the color of the meat or by whether the juices run clear, and food safety agencies consistently warn against this habit. The USDA states that color, firmness, and cooking time should never be used as indicators, because what matters is how much heat has reached the center of the food. Ground meat is a good example, since it can turn brown before it has reached a safe temperature.
The gap between owning a thermometer and using one is surprisingly large. A USDA Food Safety and Inspection Service study, described in a 2022 agency blog post, found that 88 percent of participants said they owned a food thermometer, yet only 55 percent actually used one to check their food. Closing that gap is the single biggest improvement most kitchens can make.
Types of Meat Thermometers and How Deep to Insert Them

Different thermometers work in different ways, and the type you own decides how deep the probe must go and whether it can stay in the food while it cooks. Understanding these differences matters because the reading is only trustworthy when the sensing part of the probe is fully inside the meat. Anyone who wants to master how to use a meat thermometer should begin by matching the technique to the tool, using the guide below that is based on USDA descriptions of each type.
| Type | Insertion depth | Can it stay in the oven? | Best suited for |
|---|---|---|---|
| Digital instant-read (thermocouple) | About ¼ inch or deeper | No | Thin cuts, burgers, quick checks |
| Digital instant-read (thermistor) | At least ½ inch | No | Chops, steaks, general checks |
| Dial instant-read | 2 to 2½ inches, up to the dimple | No | Roasts, casseroles, soups |
| Dial oven-safe | 2 to 2½ inches | Yes, reads in 1 to 2 minutes | Large roasts and whole birds |
| Oven probe with cord | Into the thickest part | Yes, built for it | Long roasts, covered pots, smokers |
A dial thermometer averages the temperature along the lower part of its stem, so it needs to be pushed in much deeper than a digital model, and it cannot measure thin foods unless you insert it from the side. The metal stem of an oven-safe dial model can also conduct heat from the oven and show a reading that is slightly too high, which is one reason to confirm the final number with a second check when the result matters. Several top-ranking web pages repeat only the basic advice about the thickest part of the meat, and at least one adds the questionable tip of placing the probe close to the bone, which goes against official guidance to keep the tip away from bone.
How to Use a Meat Thermometer Step by Step
The process is straightforward once you have chosen a thermometer, and following the same order each time helps you avoid the small errors that lead to unreliable readings.
- Check the thermometer’s accuracy before you rely on it. A quick ice water test, described later in this guide, tells you whether the thermometer reads correctly, and it is worth doing whenever you buy a new one or suspect it has been knocked around.
- Decide on your target temperature before you start cooking. Look up the safe minimum for the food in the table above, and if you want a particular level of doneness for steak or roast beef, note that number as well so you are not making decisions in the middle of cooking.
- Start checking near the end of the expected cooking time. Instant-read thermometers are not designed to stay in food while it cooks, so you take a reading, remove the probe, and check again a few minutes later if the food is not ready.
- Insert the probe into the thickest part of the food. Keep the tip away from bone, fat, gristle, and the edges of the pan, because these areas heat at different rates and can give you a number that does not reflect the center of the meat.
- Wait for the number to settle. A dial instant-read model takes roughly 15 to 20 seconds, while many digital models settle within about ten seconds, so reading the display too early often gives a figure that is still climbing.
- Check more than one spot in large or irregular pieces. Food does not always heat evenly, and a second reading in a different area confirms that the lowest temperature in the food has reached the target.
- Remove the food from the heat, let it rest if needed, and clean the probe. Washing the stem after every use prevents bacteria from raw meat from spreading to cooked food.
Where to Place the Probe in Different Foods
The right spot changes with the shape of the food, and placement is where most people go wrong. For this reason, it helps to think about where the meat is thickest and where it heats most slowly, rather than simply pushing the probe into the middle.
Whole chicken and turkey
For a whole bird, USDA-based guidance from university extension services is to check the innermost part of the thigh, the innermost part of the wing, and the thickest part of the breast, always without touching bone. The thigh is the slowest area to cook, so many guides suggest starting there and then confirming the wing and breast once the thigh has reached the target. For individual chicken breasts, which are flatter, insert the probe from the side so that the tip ends up in the center.
Steaks, chops, and roasts
Thicker cuts allow you to push the probe in from the top, aiming for the center of the thickest portion. Thin steaks and chops are easier to measure from the side, which places more of the sensing area inside the meat. When a roast is irregular in shape, check several places and trust the lowest number, since that is the part that cooked least.
Burgers, patties, and other thin foods
A burger is often too thin for a top-down insertion to work, because the tip can pass through the patty and read the pan or the air beneath it. Sliding the probe in sideways through the edge, until the tip rests in the center, solves this problem and is the method recommended by the USDA and extension programs for patties and similar flat items. A fast digital model with a thin tip is especially helpful here.
Carryover Cooking and Resting: Pulling Meat at the Right Moment
Meat keeps cooking after it leaves the heat, because the outer layers are hotter than the center and that heat keeps moving inward. Cook’s Illustrated explains that the effect is larger for big roasts and for food cooked at higher oven temperatures, and it advises taking a large roast out once the center is within about 10 degrees of the final target. Thin steaks and chops show much less carryover, usually only a few degrees.
This is where chef-style advice and official food safety rules need to be read together. Culinary resources often suggest pulling a medium-rare steak at around 125°F to 130°F so that it finishes near 135°F, and those numbers are below the USDA’s 145°F minimum for whole cuts. Choosing a lower temperature for beef steaks or roasts is a personal decision about risk and taste, and it is not what the official guidance recommends. For poultry and ground meat, the safest approach is to wait until the thermometer shows the official number before removing the food from the heat, since the USDA’s wording refers to the temperature measured before the food comes off the heat source.
The USDA also explains why the rest period matters. During those minutes the temperature of the meat stays steady or keeps rising, which continues to destroy harmful germs, so the three-minute rest listed for beef, pork, veal, and lamb is part of the safety step and not just a way to keep the juices in.
Checking Accuracy: How to Calibrate a Meat Thermometer

Accuracy is a central part of how to use a meat thermometer correctly, because a probe that reads five degrees off can turn a safe roast into an undercooked one or a tender steak into a dry one. The USDA describes two methods, and the ice water method is considered the best choice for most thermometers.
For the ice water test, fill a large glass with crushed ice, add clean water until the glass is full, and stir well. Lower the stem at least two inches into the mixture without letting it touch the sides or the bottom of the glass, and wait for the reading to steady. A correct thermometer shows 32°F (0°C), and University of Illinois Extension considers a thermometer acceptable if it is within two degrees in either direction.
If your dial thermometer is off, many models have a small nut under the head that you can turn with a wrench while the stem remains in the ice, until the needle points to 32°F. The boiling water method works on the same idea, using a full rolling boil, where water reads 212°F at sea level but a lower number at higher altitudes because the boiling point of water falls as elevation rises. Digital models are different, since many cannot be adjusted by the user, and Penn State Extension advises replacing a digital thermometer that fails the ice test. Oven cord thermometers and thermometer forks, according to USDA guidance summarized by food service trainers, also cannot be calibrated, so check the manual for your specific model.
Common Mistakes That Give Wrong Readings
Even people who already know how to use a meat thermometer fall into a few predictable traps, and most of them come down to where the probe ends up or how soon the reading is taken. The most frequent problem is letting the tip touch a bone, which can read hotter or cooler than the meat around it, followed closely by stopping short of the sensing area, especially with a dial model that must go in up to the dimple.
Another common error is leaving an instant-read thermometer in the oven, since these tools are not built for continuous heat and the display or plastic head can be damaged. People also tend to measure only one spot in a large roast or a whole bird, which hides cooler areas, and they sometimes forget to wipe the probe between raw and cooked food, which can transfer bacteria back onto a finished dish. Finally, relying on a built-in pop-up timer without any second check is risky, as explained in the FAQ below.
Cleaning and Caring for Your Thermometer
Wash the probe with hot, soapy water after every use, and rinse it with clean water before putting it away. Most digital and instant-read models should not be submerged, so wipe the stem and handle carefully and check the manufacturer’s instructions if you are unsure whether yours is water-resistant. Some extension programs also recommend sanitizing the stem with a food-safe solution before using it on food that is already cooked, and storing the thermometer in a protective sleeve or drawer compartment helps it stay accurate for longer.
Frequently Asked Questions
Should a meat thermometer touch the bone?
No. Official guidance says to keep the tip in the meat and away from bone, because bone can show a different temperature from the surrounding flesh and lead you to a misleading number.
Is pink pork or beef always undercooked?
Not necessarily. According to a USDA-based fact sheet from Cornell Cooperative Extension, cooked uncured red meats, including pork, can stay pink even after they have reached a safe internal temperature, which is another reason to trust the thermometer over the color.
Can I use a thermometer for foods other than meat?
Yes. The USDA recommends checking casseroles, egg dishes, stuffing, and reheated leftovers, and some manufacturers note that the same tool can also read the temperature of frying oil or candy as long as you clean it between uses.
How often should I calibrate it?
Michigan State University Extension suggests calibrating when you first buy a thermometer and checking it regularly after that, and Penn State Extension adds that a quick check is especially wise after the thermometer has been dropped or knocked around in a drawer.
Do I still need a thermometer if my turkey has a pop-up timer?
Yes. University extension guidance recommends confirming the temperature in the thigh, wing, and breast with a food thermometer even when a pop-up indicator has already triggered.
Is a digital or a dial thermometer better for beginners?
University of California extension materials rate the digital instant-read type as the best choice for most home cooks, noting that it is easy to read and works well on thin foods, while dial instant-read models are generally less precise and harder to read.
Conclusion
Learning how to use a meat thermometer takes only a few minutes of practice, and it pays off every time you cook a roast, a burger, or a holiday bird. Start with an affordable digital instant-read model, test it once in ice water, and let the number on the display, rather than the color of the meat, decide when your food is ready to come off the heat.
Disclaimer: This article is for general informational purposes and is based on publicly available guidance from the USDA and university extension programs, which is written mainly for U.S. readers. Food safety recommendations can differ between countries and can change over time, so check your local food safety authority and your thermometer’s instruction manual. Children, older adults, pregnant people, and anyone with a weakened immune system may be at higher risk from undercooked food and should follow official guidance closely. This article is not a substitute for professional medical or food safety advice.
Explore More

I’m Muhammad Ubaid, founder of YBR Magazine. I research and write detailed guides on America’s National Parks — covering entry fees, permits, best times to visit, and planning tips — using official NPS sources and up-to-date information.

